photo 5fa4f53c-9555-45d1-809b-3e537846bb4e.jpg
Showing posts with label Guest Posting. Show all posts

Thursday, October 6, 2011

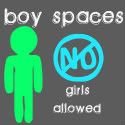
{Boy Spaces} Guest Post with Boy, Oh Boy

Okay so today I am stepping away from the helm 
in order to let a fabulous 
blogger visit with you.
If you have never been over to Boy, Oh Boy, Oh Boy! 
and you are a boy mom,
then you need to go there as soon as you are done with this post.


You will find an endless amount of fun inspiration 
from this talented lady.
I will let her introduce herself right . . . 


NOW!

Hi there, RockNRegalia readers! I'm Stacey and I blog at
Boy, Oh Boy, Oh Boy! When Jayna Rae told me she was putting together an all boy spaces event and asked me to be a part of it, I was thrilled. With three little boys (5, 2, and 15 months), I just happen to have a house full of boy spaces.


We're currently in the middle of a big move and waiting for our belongings to arrive.  A new house means new spaces and since our house is full of boys it means lots of fun boy projects to come.  I've got a Superhero bedroom all planned out for my middle guy and can't wait to get started on decorations for the playroom.  Today, though, I'm sharing my favorite stuff from my oldest son's knight room.


Some of my favorite things from his room were found through Etsy sellers.  There is a wealth of boy themed handmade or vintage finds hiding out on Etsy.


This wooden shield was a fabulous find for only 12 dollars.


One of my favorite bloggers, Pinkapotamus put together this fabulous knight mirror as a custom order.  We got to choose the colors and insignia.  The boys' favorite part is that the sword and shield are velcro which means they can be removed for hours of imaginative play.


Finally, we rounded out the boring wooden that took up an entire wall by adding these adorable wall decals.  They were very easy to remove when it came time to pack everything up and seem like they'll be in good shape to use again once our things arrive.


Let me know if you stop by to check out the rest of our boy spaces.  
Above are a few other boy related room pieces I've worked on in the last year.  You can also check out some of the Pinterest inspiration for my son's up and coming Superhero room.


Thursday, May 26, 2011

Coaster Garland

This is a little post that a put together a few weeks ago,
and shared with the readers over at 
Luxe Boulevard.


If you visited Stephanie earlier in the month,
thanks for sharing the love.


If not . . . 

Today, I have a quick and simple tutorial 
for all of you wonderful ladies.


Over in my part of Blogland I craft 
and create for my home and my boys.
Today's tutorial is a home based tutorial.

Summer is nearly here,
and this means it is time to start 
shifting around decor.

My "regular" decor;
stuff like what you see here;
The Cuban Cowboy bought my the Kitchen Fairy for my birthday.
He loves my macaroni and cheese, so it is fitting.


is essentially my Summer decor
because it is up after Easter,
 which is typically earlier than this year,
until the first of October when I bring out Halloween.

I like the calm that this decorating season brings
because my social life is hectic in the summer,
as I am sure is true for many of you.

Okay, so let's get started on our 
first Summer project.
I am sure it will only be one of many that 
is completed over the next few weeks.

This project was actually inspired by 
ad different set of coasters 
that I purchased with the intention of making the garland,
but I couldn't find them when I went to get started.

I have NO clue where they went.
I had already told Stephanie what I would be doing,
so I was frantic.
Then, I remembered that I had these strawberries coasters 
from a few years back.

Phew! Relief.

Here's what you are going to need.

  • Cardboard Coaster (Michael's often has various varieties in their $1 spot ~now $1.50 spot at mine)
  • Twine/jute
  • Hot Glue Gun/Glue Sticks
  • Scrap Felt
  • Vinyl or Stickers


This is SUPER DUPER simple. Promise.

First, you are going to cut your twine, err on the side of excess.
Then fold the twine in half to find the center.
Like so.

Now, I had 7 coasters, so I adhered 
the first one at this center point.
If you have an even number
 then use the center as a reference point for
adhering the first two coasters on either side.

I adhered the coasters by running a thin line of hot glue about 1/2 inch down from the top. 

I then laid the twine across the glue.

Next, I took a piece of scrap felt cut 
from this FAILED Easter jacket.

I added a little more hot glue on top of the twine 
and adhered the felt for stability.

To keep accurate distance between each coaster,
I laid the first coaster to one side of my hot glue gun plate;
I always use a paper plate to glue on top of.

I then laid the next coaster in the center of the plate.
I kept this up for each coaster.

After I had added three to one side of the initial coaster,
I switched the oh so scientific method of measurement 
to the other side of the plate and repeated until 
all coasters were in place.

Now we are ready for our letters.
Since I own a Cricut
I cut my word out using white vinyl.

However, if you do not own a Cricut or Silhouette, you can use ABC Letter Stickers. I would choose these 
awesome Creative Memories ones.
They are such a great size and font for projects like this.

I chose the word Summer,
and I used the Cricut font Cuttin Up 
on the Serif setting.

I cut at 2 1/2 inches because the coasters are 
about 4 inches in diameter.

Since I was short one letter, 
I used my Cricut Indie Art Cartridge to cut out a Strawberry.

Strawberries are my FAVORITE,
they were the print of the coasters I used,
and they are essentially the theme of my kitchen.

I adhered each letter to the center of a coaster.

Voila!
It was now ready to hang.

I am pleased as punch with the result.


Here's a little look at where and how 
I actually hung it in my kitchen.


I just used little white finishing nails.

And it looks like this.


I hope that you are able to create something as fun and simple for your kitchen or other room this Summer.

I would love to see it if you did.


Monday, May 9, 2011

Wanna Make a Cute Garland?

Do you want to see how to make this 
cute, fun, and summery garland?


Then stop by 


for further details.

Check back later tonight for some Mother's Day highlights.


Thursday, April 28, 2011

Where I am hanging today.

Today I am over at Time Well Spent
sharing a bit about myself and the fun things that go on over here.


She is one of my new sponsors, and I'd love for her to know how much we love her.

I would love if you visited Suze and let her know 
how awesome her blog is.

She also has an ETSY shop called Crown of Bows
 full of fun tutus and other items.

Thanks!!!


Wednesday, April 20, 2011

Guest Posting Today

Today I am guest posting over at Luxe Boulevard.

The lovely Stephanie is in the midst of moving,
so she has asked of few of us ladies to come and help a gal out.

Psst . . . there's a giveaway for this awesome coffee sleeve
inspired by Ashley of Eisy Morgan.


Please go and give Stephanie some love!!!

My new Nauti-CALI line will go up in my ETSY shop this evening.