photo 5fa4f53c-9555-45d1-809b-3e537846bb4e.jpg
Showing posts with label Kids Crafts. Show all posts

Monday, November 21, 2011

Pilgrim Cuffs Courtesy of Starbucks

Just look at these lovely pilgrim cuffs 
Monster and I whipped up tonight.

They are finished just in time for the 
Thanksgiving Festivities on Thursday.

Wanna know how we made them?

Okay,
well first I saved some Starbuck's coffee sleeves.

Yep! That's right.
Coffee sleeves.

I was driving with the Cuban Cowboy a few weeks back when 
I slipped the sleeve over my wrist like a bracelet 
and an idea was born.

My initial thought was super hero cuffs, 
which I am sure will be a project in the near future,
but then I thought of Thanksgiving 
and knew that they'd be perfect for a pilgrim outfit.

So here is what we did.

We gathered our supplies:
* 2 Starbuck's coffee sleeves
* White paint and a paint brush
* black paper
* Small circle punch
* glue
Ignore the square punch.
I was going to put buckles,
 and then I realized that cuffs have buttons not buckles.


First we painted the coffee sleeves white. 


Monster enjoyed this part,
 and he really did a decent job of not making a mess.
Well, until I decided 
it would be funny if I painted his palms white.


Then we let the cuffs dry.

Once they were dry Monster punched the circle, 
with my help of course.
Card stock can be difficult to punch through.


Finally, with some Elmer's glue he adhered the circle where buttons would go on cuffs.

The "seam" of the sleeve is perfect because it makes them look even more like cuffs.
This one even got a little wet and bent so it looks more like fabric.

I LOVE THEM!!!!


I am going to make Pottery Barn copy cat felt pilgrim hats tonight now that the boys are in bed.
They will be perfectly festive on Thursday.


Oh yes, and after our fun photo shoot Monster decided 
that his little brother needed to participate too.
So, he put Roly Poly in the middle of the pumpkins,
 and I let him take some photos.
He is always trying to eat things

Okay, so go and try this with your little one.
It is easy.
Cheap.
Fun.


Friday, July 8, 2011

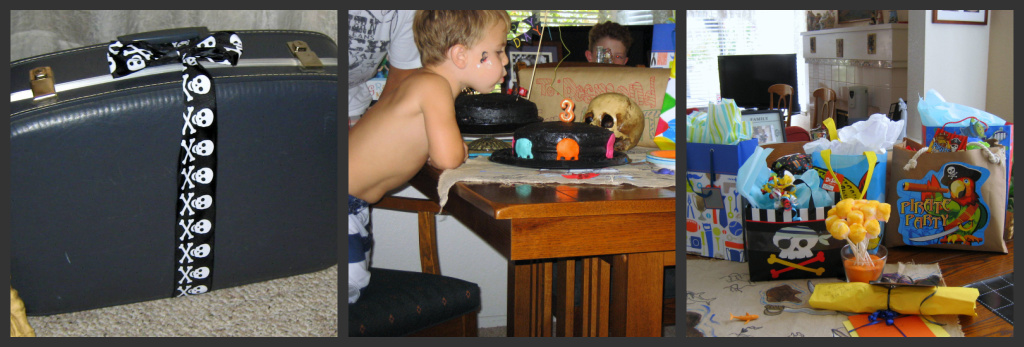
Pirate PARRRTY

Pirates are super fun,
even though there was a time where I was pirated out.

Thank goodness right then Christian Bale came out with a cowboy movie
and gave me some space away from the pirates
allowing me to fall back in love with them.

Now  that I am a party planning mama,
I had an excuse to throw a Pirate Party.

Here is the banner that inspired it all.
I picked this up post Halloween last year.

I loved the colors.

To make this simple 
I am just going to show you some collage snap shots
with basic titles.
If you have any questions please feel free to ask.


THE INVITATION


INSIDE DECOR


OUTSIDE DECOR


THE PIRATES
Monster and Tia Niki (She was a phenomenal help!)
Yes it was 100 and she wore that. AWESOME!!!


THE FOOD


THE CAKE


THE FUN


HAPPY BIRTHDAY MONSTER


Okay, so that is it!
Thanks for letting me share with you.
Let me know what you think.


Next, an Owl party on the 23rd.
Have a wonderful weekend.

This party is linked to:
Visit thecsiproject.com


Monday, April 25, 2011

Butterfly in the Sky

Well, Easter has past, but Spring is still here for another month or so,
which to me means that Spring decor is staying for a little while longer.

I didn't do all of that hard work for NOTHING, after all.

This is a little craft project that Monster and I whipped up just a few days before Easter.

It was inspired by this first LARGE coffee filter butterfly
that he made during story time at the Apple Valley Library.


It's awesome, right?
Where did they get such large coffee filters?

Anyway, he enjoyed the little project so much
that I decided we could replicate it at home using supplies that we had on hand.

Supplies: 
Coffee filters
Markers
Scissors
Spray bottle with water
Wire or pipe cleaners


1. Gather the above supplies. 
2. Fold your filter in half and cut 2 triangles from the top and bottom of the fold.
3. Begin coloring
4. Notice that the color should leak through,
 but you still should color on both sides for emphasis and style.

NOW IS THE FUN PART!!!!

5. Get out the spray bottle and soak down the "butterflies" with water.
This will cause the ink to bleed and create a tie dyed effect.

6. Hang to dry.
I am lucky enough to have a cool clothes line in my laundry room.
It is Michael Grave's for Target if you want to pick one up.
I love that it is retractable, so I only have it out when I need it.

7. Sorry, I didn't photograph this step, but it is easy like the rest.
Take your wire or pipe cleaner,
scrunch up the center of the butterfly,
 and twist to make the body and antennae.

Now they should look something like this.


I love all the bright colors that this added to the kitchen.
I just folded Scotch tape up and stuck it to the butterfly and then the wall.

Speaking of butterflies . . .
I actually have another Eisy Morgan recreate.
I am actually going to call this one a FAIL.
I did improve upon it after these photos,
and now it is presentable.
You are about to see what I mean.


It is a recreate of her beaded dragonfly headband tutorial.
I knew my beads would make a good butterfly,
but I wasn't careful enough and my glue got a bit messy and clumpy.

Ashley's is WAY better.
Check out her tutorial and try it out.
It is a quick project, and hopefully you have better luck than I did.

Let me know if you try it
or if you make the coffee filter butterflies.
I'd love to hear about your experiences.

I hope that your Easter Weekend was as wonderful as ours was.