Roly Poly's Valentine's outfit is coming together nicely. It was inspired by this wonderful Starbuck's Bearista from several Valentine's past.
He's Cute, right?
Well, I just love the pink and blue color scheme for Valentine's day. Roly Poly will be wearing the blue sweateralls I made earlier in the month. A coffee died onesie; this incorporates the tan of the bears jacket. I am planning on going big and making a jacket too (time willing). And he will be wearing a little boutonniere resembling the rose that the bear is holding.
Now, I have no clue what Monster will wear to the Valentine's party his Bestie throws, but he will be bringing her a special hostess Valentine inspired by that same rose. It will be a cute little bouquet; one that will not wilt. I hope the same is true for their friendship.
Okay, so want to know how to make these precious teeny tiny ribbon roses?
Let's get started!
First, get some supplies. Like this:
- Green floral tape
- sucker sticks
- pink sheer ribbon (mine was a pack of 20 pre-cut strips). Your strips need to be about 4-5 inches.
- Green felt
- Hot glue gun/glue
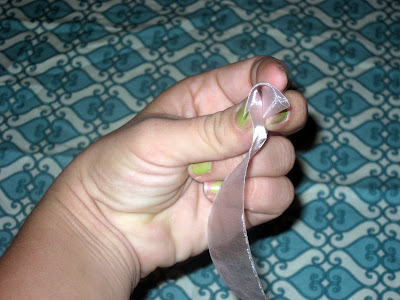
Okay, first things first! You have to roll up the rose. Follow the pics and directions below:
Fold over first end
Then fold it back the opposite way. This will help to seal it in.
Roll in this direction until most of your ribbon has been used. Then switch directions again.
When you are about here there is one last switcheroo.
This last one tucks in your end. It should look like this.
Okay, You are now going to glue. Sorry no photos. I just couldn't figure out how to glue and hold the camera. Glue by scrunching and making sure you fill in the layers at the bottom.
THE BOUTONNIERE
You should have your rose. Then cut out a 1/4 circle of green felt and two oblong leaves.
Glue the rose onto the circle. The rose should be laying on its side.
Fold the leaves like so and add a teeny tiny bit of glue toward one end to maintain the fold. Glue each leaf onto the circle in front of the rose. It is complete (sorry, no photo alone. Please refer to the first photo above or to the final photo of the post). I will be sewing the boutonniere onto the sweateralls, but velcro would also work and be baby friendly.
THE BOUQUET
Take your rose and glue the stick into the center. You will now wrap with the floral tape (Again, it was too difficult to photograph this step).
Your long stemmed rose is complete. Make as many as you like. I made three and then tied them together in a bouquet for Monster's gal pal. I am sure she will love them.
My boys are ready to go!
 |
| Portrait taken by Little Skullz Photography |


These are really cute! :) I'd like to try this sometime if i can find sticks that i can use! Mind you, twigs from the garden would be a good replacement too. :)
ReplyDelete